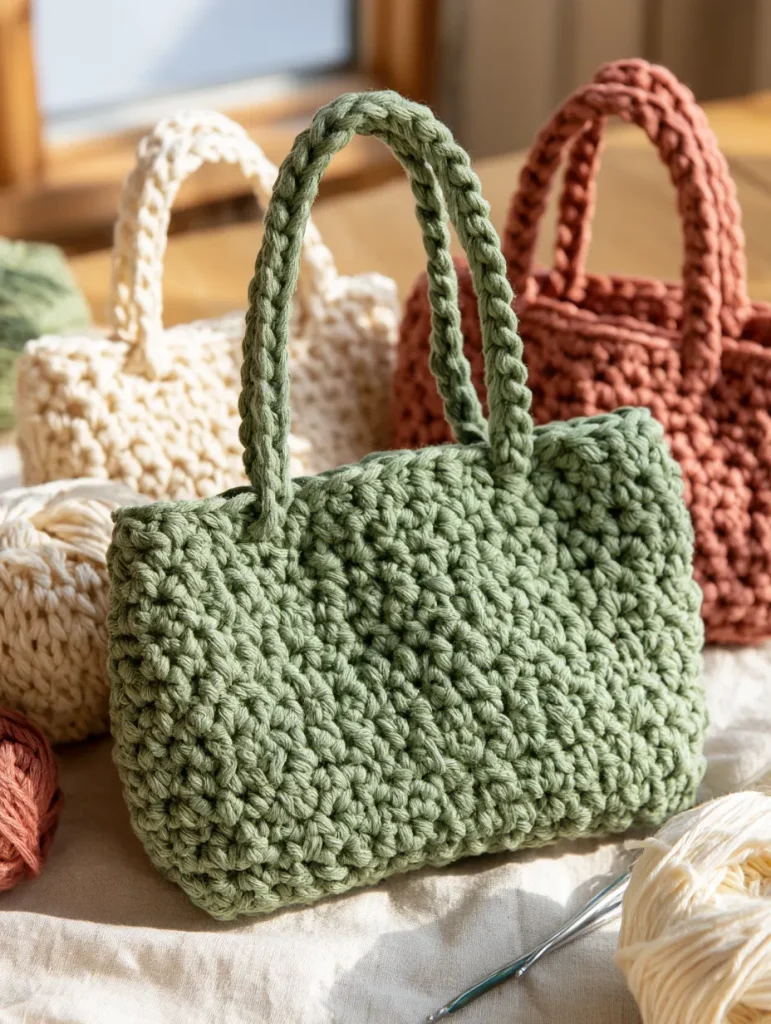
A handmade crochet tote is one of those projects that feels impressive without needing complicated techniques.
This beginner-friendly tote is made from two simple rectangles, which means you can focus on practicing your stitches instead of worrying about difficult shaping.
The finished bag is roomy enough for everyday essentials, a small crochet project, books, or a trip to the market.
If you already know how to chain and make a half double crochet, you can make this bag.

Crochet Tote Bag at a Glance
Difficulty: Beginner
Construction: Two rectangles joined together with two separate handles
Main stitch: Half double crochet
Suggested yarn: Medium-weight cotton or cotton blend
Hook: 5 mm crochet hook, or size needed to achieve a fabric you like
Finished size: Approximately 14 inches wide by 13 inches tall, excluding handles
The exact dimensions may vary slightly depending on your yarn and tension.
Materials
You will need:
- Approximately 400–500 yards of medium-weight yarn
- 5 mm crochet hook
- Yarn needle
- Scissors
- Stitch markers
- Measuring tape
Cotton yarn is a great choice for this project because it creates a sturdy fabric and usually stretches less than very soft acrylic yarn.
A cotton blend can work well too.
For a Yumnivo-inspired look, try:
- Sage green
- Warm cream
- Oatmeal
- Dusty terracotta
- Soft beige
Abbreviations
This pattern uses US crochet terminology.
- ch = chain
- hdc = half double crochet
- sc = single crochet
- sl st = slip stitch
- st = stitch
- sts = stitches
Gauge
Approximately:
14 half double crochet stitches = 4 inches
10 rows = 4 inches
Gauge does not need to be absolutely exact for this bag, but your fabric should feel firm enough to hold its shape.
If the fabric feels too loose, try a slightly smaller hook.
If it feels very stiff and difficult to work into, try a larger hook.
Before You Begin
This tote is constructed from two identical rectangular panels.
You will crochet:
- Front panel
- Back panel
- Two handles
The front and back are then joined along the sides and bottom.
Finally, the handles are attached securely to the upper edge.
That is all the construction required.
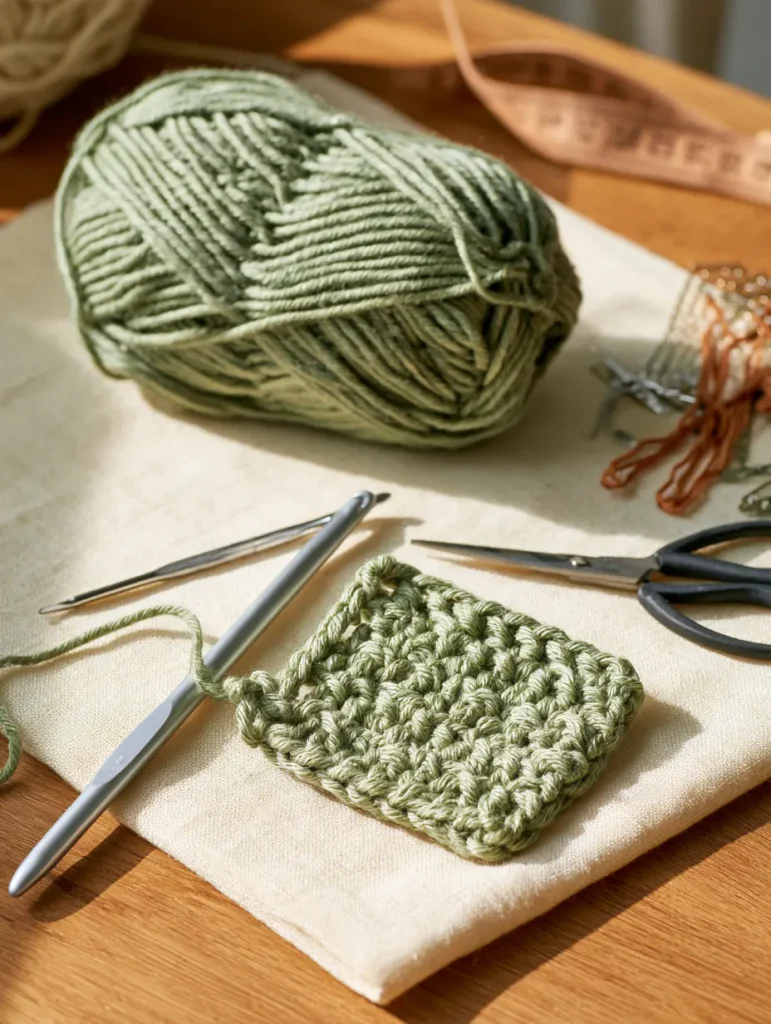
Front Panel
Chain 51.
Row 1
Half double crochet in the second chain from the hook and in each chain across.
You should have 50 half double crochet stitches.
Chain 1 and turn.
Row 2
Half double crochet in each stitch across.
Chain 1 and turn.
Rows 3–34
Repeat Row 2.
Your rectangle should measure approximately 14 inches wide and 13 to 14 inches tall.
Do not fasten off until you are happy with the size.
If you want a taller tote, simply add more rows.
Fasten off and weave in the loose end.
Back Panel
Repeat exactly the same instructions used for the front panel.
Try to make both rectangles the same size.
Lay the two pieces on top of each other occasionally while you work so you can check that their dimensions match.

Joining the Tote
Place the two panels together with the sides you want facing outward positioned appropriately for your preferred seam.
Line up the edges carefully.
Use stitch markers to hold the corners together if needed.
You can join the pieces using single crochet, slip stitches, or a yarn needle.
For an easy visible crochet seam, use single crochet.
Start at one upper corner.
Single crochet evenly down the first side.
Continue across the bottom.
Then work up the second side.
Leave the top completely open.
Fasten off and weave in the yarn end securely.
Turn the bag if necessary so the seam appearance you prefer is on the outside.
Optional Reinforced Top Edge
A simple border around the opening can make the bag look more finished.
Join your yarn near one side seam.
Work one single crochet into each stitch or row end around the entire top opening.
Join with a slip stitch to the first single crochet.
You can work one additional round if you want a firmer edge.
Fasten off.
This step is optional, but it can help stabilize the top of the tote.
Making the Handles
Make two identical straps.
Chain 81.
Strap Row 1
Half double crochet in the second chain from the hook and across.
You should have 80 stitches.
Chain 1 and turn.
Strap Row 2
Half double crochet in each stitch across.
Chain 1 and turn.
Strap Row 3
Half double crochet in each stitch across.
Fasten off, leaving a long yarn tail for sewing.
Repeat to make the second handle.
Each handle should measure approximately 22–23 inches long, depending on your tension.
If you want shorter hand-held handles, begin with fewer chains.
For longer shoulder straps, add more chains.

Attaching the Handles
Lay the bag flat.
Position the ends of the first handle approximately 3 inches in from each side edge of the front panel.
Use stitch markers to temporarily hold the handle in place.
Make sure the handle is not twisted.
Use a yarn needle and the long yarn tails to sew each end securely to the inside of the bag.
Stitch through several rows so the weight of the bag is distributed across a larger area.
Repeat with the second handle on the back panel.
Before finishing the yarn ends, hold the tote by both handles and check that they are positioned evenly.
Once you are satisfied, secure all yarn ends.
How to Make the Handles Stronger
Bag handles receive more stress than almost any other part of a crochet tote.
To make them stronger:
- Sew through the attachment area several times
- Attach each handle across multiple rows
- Avoid using an extremely stretchy yarn
- Make wider straps rather than very thin straps
- Add another row to each strap if needed
You can also sew a ribbon or cotton webbing along the underside of the crochet strap if you plan to carry heavier items.
Optional Color-Block Version
You do not need to make the entire tote in one color.
A simple color change can completely change the look.
For example:
Rows 1–22: Cream
Rows 23–34: Sage green
Or try:
Main bag: Oatmeal
Handles: Dusty terracotta
Another easy option is to make the front and back in one color and use a contrasting color for the top border and handles.
Keep the construction exactly the same.

Optional Inside Pocket
If you want a small pocket inside your tote, crochet another rectangle.
Chain 21.
Half double crochet across for approximately 12–14 rows, or until the pocket reaches the size you want.
Fasten off.
Position the rectangle against the inside of one panel.
Sew along the bottom and both sides.
Leave the top open.
A small pocket is useful for:
- Keys
- Phone
- Stitch markers
- Lip balm
- Other small items
It is easier to attach the pocket before joining the two main bag panels, but you can also add one afterward.
Should You Line a Crochet Tote Bag?
A lining is optional.
This tote can be used without one, especially when crocheted with sturdy cotton yarn and relatively tight stitches.
However, adding fabric lining can help:
- Reduce stretching
- Protect the crochet fabric
- Keep small objects from poking through stitches
- Give the bag more structure
- Create a more polished interior
If you are new to sewing, it is completely fine to use your first tote without a lining.
You can always learn that finishing technique later.
How to Keep a Crochet Tote From Stretching
Crochet naturally has some stretch.
For bags, too much stretch can cause the tote to lose its shape.
A few choices can help.
Choose sturdy yarn
Cotton and cotton blends tend to work well for bags.
Use a firm stitch
Half double crochet creates a fairly solid fabric.
Single crochet is even denser if you want a more structured tote.
Keep your tension consistent
Large loose stitches will stretch more easily.
Reinforce the handles
The handle attachment points carry much of the weight.
Add lining
A fabric lining can dramatically reduce stretching.
Can You Make This Tote Larger?
Yes.
The construction is very easy to customize.
To make the tote wider, begin with a longer foundation chain.
To make it taller, simply crochet more rows.
For example, you could create:
- Small book tote
- Everyday shoulder tote
- Large market bag
- Crochet project bag
- Beach tote
Remember that a much larger bag may need stronger handles and additional reinforcement.
Can You Add a Longer Shoulder Strap?
Yes.
Instead of two tote handles, you can create one long strap.
Make the foundation chain long enough for the bag to sit comfortably at your side.
Crochet several rows so the strap is strong enough.
Attach one end to each side of the tote.
You could also use a purchased fabric or leather-style strap if you prefer a different look.
What Yarn Is Best for This Tote?
Medium-weight cotton is a reliable option.
It gives the stitches clear definition and creates a relatively sturdy fabric.
Cotton blends can also be comfortable to work with while providing additional softness.
If you use acrylic yarn, remember that some acrylic fibers can stretch more under weight.
Whatever yarn you choose, check how the fabric feels after crocheting several rows before committing to the entire bag.
How Much Yarn Do You Need?
For a tote around the size shown in this pattern, approximately 400–500 yards of medium-weight yarn should give you a useful starting estimate.
The exact amount depends on:
- Yarn thickness
- Hook size
- Tension
- Final bag dimensions
- Strap length
- Additional borders or pockets
It is better to have a little yarn left over than to run out before finishing the second handle.
Can a Complete Beginner Make This Tote?
This project is suitable for someone who already understands:
- How to make a chain
- How to half double crochet
- How to turn at the end of a row
- How to count stitches
- How to weave in yarn ends
If this is one of your first crochet projects, work slowly and count your stitches at the end of each row.
If you accidentally add or lose stitches, your rectangle can gradually become wider or narrower.
Using a stitch marker in the first and last stitch can help keep your edges straight.
Beginner Tips for Better Crochet Bags
Count your stitches frequently.
Check that both panels remain the same size.
Do not pull the starting chain too tightly.
Keep your tension comfortable and consistent.
Use stitch markers when assembling the pieces.
Take extra time when attaching the handles.
Weave in all ends securely.
Do not worry if your first handmade bag is not absolutely perfect.
Slight variations in tension and shape are part of learning.
Make It Your Own
Once you understand this basic tote construction, you can create many variations from the same idea.
Try:
- Stripes
- Color blocking
- Granny square pocket
- Crochet flowers
- Wooden buttons
- Longer straps
- Shorter handles
- Contrasting borders
- Decorative tassels
The basic structure stays simple while the details make each bag feel completely different.
A Simple Bag You Can Actually Use
One of the best things about beginner crochet projects is making something that becomes part of everyday life.
This tote starts with two simple rectangles, but once they are joined and handles are added, you have a practical handmade bag.
Use it for yarn, books, everyday essentials, or your next trip to the market.
And once you finish your first one, you already know the construction needed to make another in a different size, color, or style.
Sometimes the simplest crochet projects are the ones you end up using the most.