
Crochet pumpkins bring a little handmade warmth to a shelf, coffee table, or autumn centerpiece.
Their rounded shape may look complicated, but you can make a simple pumpkin from a flat crochet rectangle.
Work a few rows, join the ends, add stuffing, and gather the openings. A small stem and a few shaping stitches help turn that rectangle into a pumpkin.
You can keep the colors traditional with warm orange and brown, or try cream, sage green, and dusty terracotta for a softer autumn look.
Below are 10 easy crochet pumpkin ideas, followed by a beginner pattern you can adapt for different sizes and finishes.

What Makes a Crochet Pumpkin Beginner-Friendly?
For your first pumpkin, look for a design with:
- One basic stitch
- Simple rows worked back and forth
- A consistent stitch count
- Minimal color changes
- A small amount of sewing
- A stem made separately and stitched into place
A rectangle-based pumpkin is a useful place to start because you can concentrate on your stitches before shaping the finished piece.
The starter pattern below uses single crochet and single crochet in the back loop only. You do not need a magic ring, increases, or decreases for the pumpkin body.
What You Need to Crochet a Pumpkin
For the starter pattern, gather:
- Smooth medium-weight yarn in your pumpkin color
- A small amount of brown yarn for the stem
- A 4 mm crochet hook as a starting point
- Polyester fiberfill or your preferred soft stuffing
- Scissors
- A blunt yarn needle long enough to pass through your stuffed pumpkin
- A measuring tape
- Two stitch markers
- Optional green yarn for a curly vine
Choose a fabric that feels dense enough to hold the stuffing without large gaps. Adjust the hook size if your stitches are too open or too difficult to work into.
Medium yarn is labeled category 4 in the Craft Yarn Council’s yarn weight system. Yarn thickness still varies within that category, so the fabric you make matters more than using one hook size for every yarn.
Smooth cream, light orange, or sage yarn can make individual stitches easier to see while you learn.
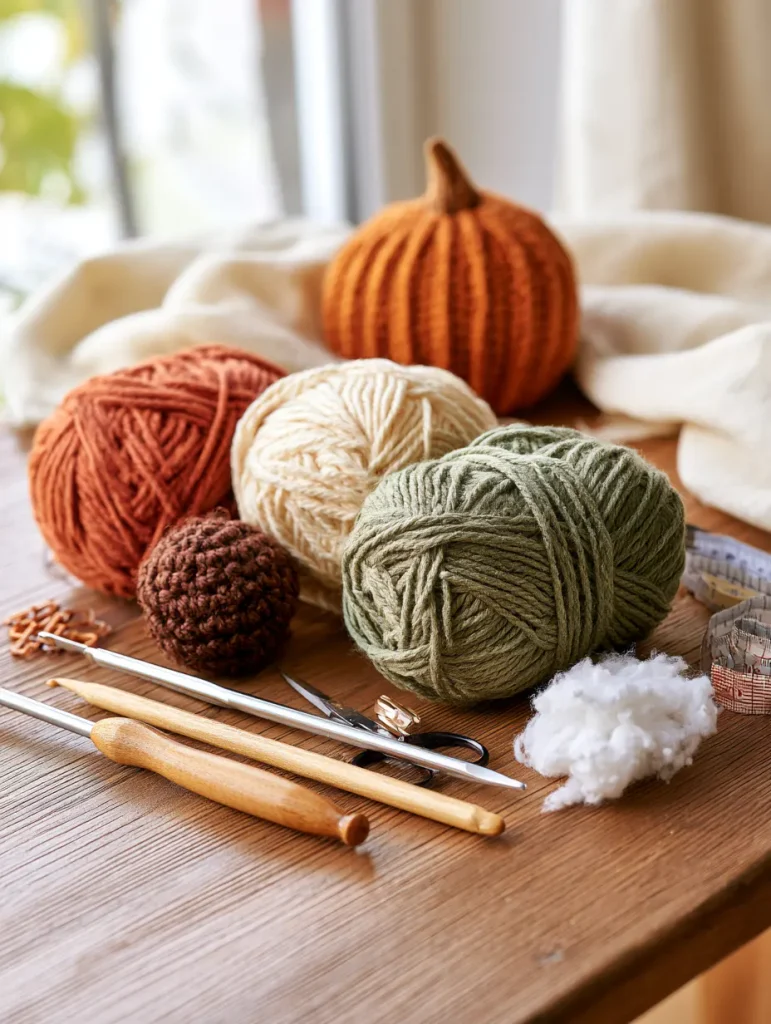
1. Simple Ribbed Crochet Pumpkin
A ribbed pumpkin is a good first project if you already know how to make a chain and a single crochet stitch.
Working into the back loop leaves the other loop visible, creating a ridged texture as you repeat the rows.
Once the rectangle is assembled, these ridges run from the top of the pumpkin toward the bottom.
Basic idea
Crochet a rectangle using single crochet in the back loop only.
Join the foundation edge to the final row to form a tube.
Gather one opening, add stuffing, and close the other opening.
Use a separate strand of yarn to shape the pumpkin before adding a brown stem.
The written instructions later in this article explain each step.
2. Mini Crochet Pumpkins
Mini pumpkins are a sweet way to add a small autumn detail to your home.
Place a few in a shallow bowl, beside a vase, or along the edge of a bookshelf.
Use a shorter foundation chain to make a smaller rectangle, then work enough rows to keep the same proportions as the larger version.
For your first mini pumpkin, choose smooth yarn so the small stitches remain easy to see.
Keep the stem short and add stuffing in little pieces. A tiny pumpkin needs enough filling to hold its shape while staying soft enough to sculpt.

3. Chunky Crochet Pumpkin
Bulky yarn gives a pumpkin a soft, substantial appearance.
The stitches become part of the decoration, especially when you choose a simple ribbed design.
Use the same rectangle construction, but choose a hook that creates a dense fabric with your thicker yarn.
The same stitch count will usually produce a larger piece with thicker yarn. If you want a small chunky pumpkin, shorten the starting chain and check the rectangle’s measurements as you work.
Smooth bulky yarn can be easier to follow than fluffy or chenille yarn when you are learning to recognize stitches.
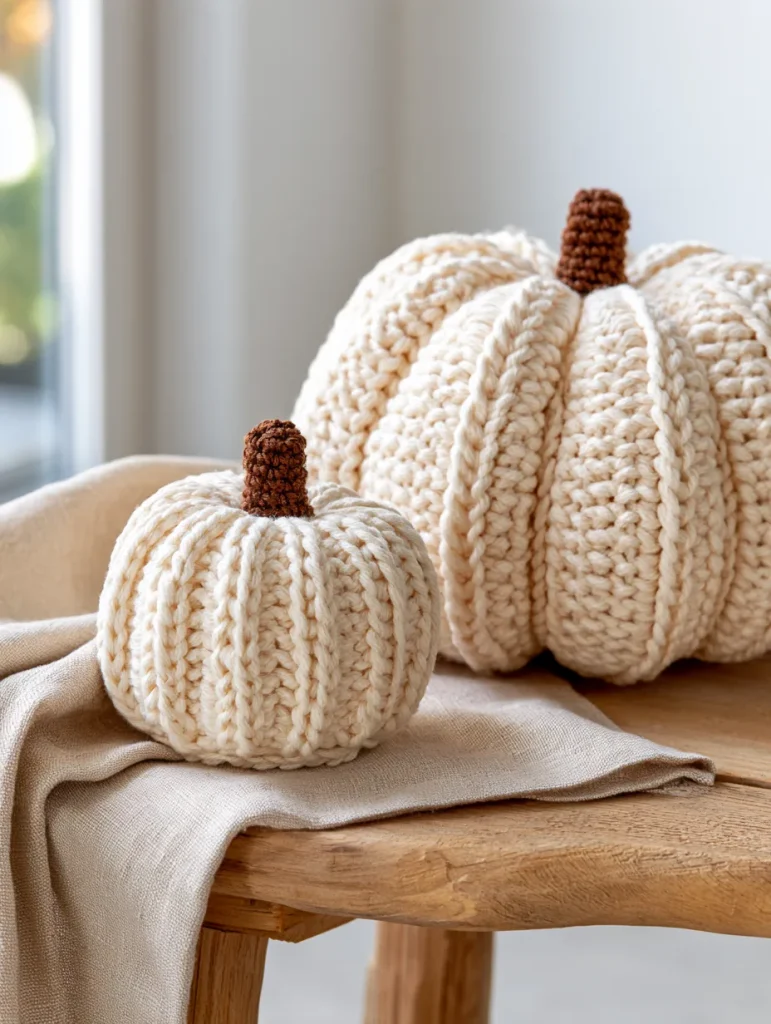
4. Cream Crochet Pumpkin
A cream pumpkin fits naturally into a soft, neutral autumn display.
Pair it with a brown stem, a linen runner, and a little natural wood.
Because the color is simple, the ribbing and shaping become the main details.
Try making two cream pumpkins in different sizes. Their slightly different shapes can make a small arrangement feel relaxed and handmade.
5. Sage Green Crochet Pumpkin
Sage green brings a gentle touch of color to an autumn arrangement.
It works beautifully beside cream, oatmeal, and dusty terracotta.
Keep the construction simple and let the yarn color do the work.
A slightly flattened shape and a short brown stem create a pumpkin that looks at home on a bookshelf or coffee table.
For a coordinated Yumnivo-style collection, use the same yarn range for all your pumpkins and change the color or starting chain length.
6. Striped Crochet Pumpkin
Stripes are an easy next step once you feel comfortable keeping the same stitch count in every row.
Try alternating four rows of cream with four rows of muted orange.
Change color on the final yarn-over of the last stitch before the new stripe. Secure and weave in the ends before assembling the pumpkin.
With this rectangle construction, the rows run from top to bottom on the finished pumpkin, so changing colors between groups of rows creates vertical stripes.
Choose two yarns of the same weight and similar thickness to keep the texture consistent.

7. Friendly Halloween Crochet Pumpkin
A simple stitched face can turn an orange pumpkin into a cheerful Halloween decoration.
Use black yarn to embroider two small eyes and a smile.
For easier access to the back of your stitches, add the face before sewing and stuffing the rectangle. Position it near the center of the fabric, away from the edges that will be gathered or joined.
Keep the expression simple so it remains clear once the pumpkin is shaped.
You can use the same body pattern for both a plain autumn pumpkin and a Halloween version.

8. Crochet Pumpkin With a Curly Vine
A little green curl adds movement beside the stem.
You can make one with a short foundation chain and two single crochet stitches in each chain. The extra stitches encourage the strip to curl.
For the version below, chain 13, then work two single crochets into the second chain from the hook and every remaining chain. You will have 24 stitches.
Fasten off, leaving a sewing tail. Coil the strip gently with your fingers, then sew one end securely beside the stem.
One short vine is enough for a small pumpkin.
9. Tall Crochet Pumpkin
Pumpkins do not all need to have the same round shape.
For a taller variation, make a rectangle with a longer starting row relative to the number of rows you work.
A useful starting experiment is to stop when the accumulated rows measure about one and a half times the width of a finished row, instead of twice that width.
This gives you a narrower tube relative to its height.
Stuff and shape it gently, using less tension when drawing the top toward the bottom. The final proportions will depend on your yarn, tension, and filling.
10. A Coordinated Crochet Pumpkin Set
A small group gives you room to play with color and scale.
Try combining:
- One larger cream pumpkin
- One medium sage pumpkin
- One mini terracotta pumpkin
Keep the stems the same color to tie the collection together.
You can use the starter pattern for every pumpkin, adjusting the foundation chain and working each rectangle to the same proportions.
Arrange the finished pieces loosely on a tray or along a shelf, leaving a little space between them so the individual shapes remain visible.

A Simple Crochet Pumpkin Pattern to Start With
This pumpkin begins as a flat rectangle. You will sew it into a tube, gather the openings, and shape it with yarn.
The instructions use US crochet terms. In UK terminology, the US single crochet stitch is called double crochet. You can check this distinction in the Craft Yarn Council’s abbreviation guide.
Stitches and abbreviations
- ch: chain
- sc: single crochet
- BLO: back loop only
- st: stitch
To work in the back loop only, look at the two loops forming the top of the stitch. Insert your hook beneath the loop farther away from you, then complete a normal single crochet.
Before you begin
Use smooth medium-weight yarn and begin with a 4 mm hook, adjusting if needed to make a dense, workable fabric.
Gauge is not fixed for this decorative project. Your yarn, hook, and tension determine the finished size.
The turning chain does not count as a stitch. Keep 20 single crochet stitches in every body row.
Step 1: Make the foundation chain
Chain 21.
For Row 1, work one single crochet into the second chain from the hook and into each remaining chain.
You should have 20 single crochet stitches.
Step 2: Crochet the ribbed rectangle
For Row 2, chain 1 and turn.
Work one single crochet in the back loop only of each stitch across. You should still have 20 stitches.
Repeat Row 2, counting regularly and marking the first and last stitch if helpful.
Measure the width across one completed row without stretching it. Continue until the accumulated rows measure approximately twice that width.
For example, if one row measures 10 cm across, work until the rectangle measures about 20 cm in the other direction. This describes the flat fabric, not the finished pumpkin.
Fasten off, leaving a sewing tail of about 60 cm. Use a longer tail for a larger piece.

Step 3: Join the two short edges
Bring the foundation-chain edge and the final-row edge together.
Match their 20 stitch positions and sew across with a yarn needle, joining one position to the corresponding position on the opposite edge.
This creates a tube. The row-end edges remain open at the top and bottom.
Turn the tube so the seam sits inside.
Step 4: Gather the bottom
Thread your yarn needle with a fresh strand of matching yarn if needed.
Work a running stitch around one opening, picking up a small amount of fabric at each row end.
Pull gradually to bring the opening together. Secure it with a few small stitches across the gathered center, then fasten off and hide the end inside.
Step 5: Add stuffing and close the top
Add small pieces of stuffing and spread them evenly.
The pumpkin should hold its shape while remaining soft enough to squeeze gently.
Gather the second opening in the same way, pulling the yarn gradually and securing the center with a few stitches.
If the opening is difficult to close, remove a little stuffing before pulling harder.
Step 6: Shape the pumpkin segments
Cut a long strand of strong, smooth matching yarn. About 1.5 m is a practical starting length for a small pumpkin; larger pieces will need more.
Anchor the strand securely at the bottom center, leaving a tail for fastening off.
Pass the needle up through the center of the pumpkin and out at the top. Bring the yarn down the outside to the bottom center, then pass the needle up through the center again.
Pull gently to form the first indentation.
Repeat around the pumpkin to create six spaced indentations. Adjust the tension as you go so the sections look balanced.
After the sixth indentation, pass the needle back down through the center. Fasten off securely at the bottom and hide the ends inside.
Use a smooth, strong yarn for shaping if your decorative yarn breaks or sheds when pulled.
Step 7: Crochet and attach the stem
With brown yarn, chain 6.
For Row 1, single crochet into the second chain from the hook and each remaining chain. You will have 5 stitches.
For Rows 2–5, chain 1, turn, and work one single crochet through both loops of each stitch across. Keep 5 stitches in every row.
Fasten off with a sewing tail.
Bring the foundation edge and final row together to form a small tube, then sew the seam. Close one end with a few stitches to make the top of the stem.
Sew the open end securely over the gathered top of the pumpkin. Weave in the remaining ends.
Add the optional curly vine from idea 8 if you would like a little green detail.
How Do You Make Different Pumpkin Sizes?
Change the foundation chain while keeping the same construction.
These are starting options for making a relative size range with the same yarn and hook:
| Version | Foundation chain | Single crochet stitches in each row |
|---|---|---|
| Mini | 14 | 13 |
| Standard | 21 | 20 |
| Larger | 28 | 27 |
For each version, work until the accumulated rows measure approximately twice the width of one completed row.
Always begin Row 1 in the second chain from the hook.
These chain counts do not guarantee specific finished measurements. Make one pumpkin first, measure it after stuffing and shaping, then adjust the next one to suit your display.
How Much Yarn Do You Need?
Yarn use depends on your pumpkin’s size, yarn thickness, hook, and tension.
You will also need yarn for sewing, shaping, and the stem.
If you want to make a matching set, weigh your yarn before and after the first pumpkin. The difference gives you a useful estimate for another pumpkin made with the same materials and stitch count.
Keep a little extra available for finishing.
Why Can You See the Stuffing Through the Stitches?
Visible gaps can come from loose stitches, a large hook, or too much stuffing stretching the fabric.
Try making a small swatch with a slightly smaller hook.
If the fabric looks dense before filling, add less stuffing and distribute it more evenly.
Pulling the shaping yarn too tightly can also open gaps, so tighten each segment gradually.
Why Does the Pumpkin Look More Like a Ball?
A rounded shape is normal before you add the shaping strands.
The central yarn passes draw the top and bottom closer together. The strands around the outside create the pumpkin’s segments.
Adjust each strand a little at a time and gently redistribute the stuffing with your fingers.
For a flatter pumpkin, remove some filling before closing and shaping the piece.
Why Are the Gathered Openings Still Visible?
Thick fabric can leave a small gap after you pull the gathering thread tight.
Take a few additional stitches across the opening, catching the gathered crochet fabric from opposite sides.
At the top, the stem can cover the remaining gathered area once the opening is securely closed.
How Do You Keep the Rectangle Straight?
Count the stitches at the end of each row.
The starter version should have 20 stitches throughout.
Place a marker in the first and last stitch, and remember that the turning chain is not an extra stitch.
If the rectangle begins to widen or narrow, check the row edges before continuing.
How Long Does a Crochet Pumpkin Take?
The time depends on your experience, materials, and pumpkin size.
Leave time for sewing and shaping as well as crocheting the rectangle. Those finishing steps make a noticeable difference to the final appearance.
You can divide the project into comfortable stages: crochet the body, assemble and fill it, then add the stem and finishing details.
How Should You Care for Crochet Pumpkins?
Follow the care instructions for both your yarn and stuffing.
For routine dust, try a gentle surface clean first. If you wash a pumpkin, reshape it afterward and allow the filling to dry completely before storing it.
Store seasonal decorations somewhere clean and dry so you can bring them out again the following autumn.
Start With One Simple Pumpkin
Choose a yarn color you enjoy and begin with a small ribbed rectangle.
Keep counting your stitches, add the stuffing gradually, and take your time with the shaping.
Once the first pumpkin is finished, try changing one detail: the size, the color, a little vine, or a stitched Halloween face.
A few variations can turn one simple construction into a collection that feels entirely your own.